Building a covered patio attached to your house transforms outdoor living while adding real value to your property. Unlike a standalone structure, an attached patio integrates with your existing home’s architecture and plumbing, which creates both opportunities and challenges. Whether you’re planning a simple lean-to roof or a more elaborate design with integrated utilities, understanding the essentials of covered patio attached to house plans keeps your project on track, on budget, and up to code. This guide walks you through design considerations, material selection, and what to expect from permits and professional involvement so you can make confident decisions before breaking ground.
Table of Contents
ToggleKey Takeaways
- A covered patio attached to your house must properly integrate with your home’s existing structure, requiring verification of attachment points, load-bearing walls, and foundation type before any construction begins.
- Drainage planning is critical for attached patios—improper grading causes expensive foundation damage, so plan runoff flow and consider gutters, downspouts, or drain systems early in your design.
- Covered patio attached to house plans require building permits in nearly every jurisdiction, with inspectors verifying roof load transfer, flashing details, and electrical work to ensure code compliance.
- Foundation and framing materials must be weather-resistant: use frost-protected concrete slabs or piers below the frost line, pressure-treated lumber for posts, and stainless steel or galvanized hardware to prevent rust and failure.
- Hire a structural engineer or licensed contractor for loads over 200 square feet, brick or stone attachment points, electrical additions, or when local codes require professional certification to ensure safety and legal protection.
- Design your attached patio layout by measuring your house wall, marking the footprint, sketching post locations 8–12 feet apart, and coordinating with your local building department before committing to the project.
What to Consider Before Planning Your Attached Patio
Before sketching a single line, nail down the basics. Start by examining your home’s existing structure: identify where the patio will attach (foundation type, rim joist height, existing wall framing), and check if that wall is load-bearing or non-structural. Attached patios need proper attachment points, and a structural engineer or experienced contractor can confirm whether your chosen location can handle the connection without undermining the main house.
Next, assess drainage. A covered patio channels water off the roof and toward your foundation or yard, improper grading causes expensive problems. Plan where runoff flows and whether you’ll need gutters, downspouts, or a drain system. Also consider sun exposure and prevailing winds: these affect whether the space stays comfortable year-round and how much shade coverage you actually need.
Check local setback requirements (how far the structure must sit from property lines) and assess existing utilities. Is there an underground gas line, electrical conduit, or water main where you want to dig footings? Call your local utility locating service before any digging starts. Finally, picture daily use: will the patio connect directly to your kitchen, living room, or bedroom? Does it need access to existing outdoor features like a deck or pool? These details shape the layout and eventually the permitting requirements.
Popular Design Styles for Attached Covered Patios
Modern and Contemporary Designs
Modern attached patios favor clean lines, minimal ornamentation, and materials like steel, concrete, and composite decking. A flat or low-slope roof with integrated gutters keeps the look sleek, while large sliding glass doors or frameless systems blur the boundary between indoors and out. Polished concrete slabs, composite decking boards, and neutral color palettes (grays, blacks, soft whites) dominate this aesthetic. The benefit here is low maintenance and timeless appeal, though budget for higher-end materials and potential metal fabrication. These patios often include integrated lighting (recessed, linear, or pendant) and often work best with rectangular footprints and minimal overhang variation.
Traditional and Rustic Styles
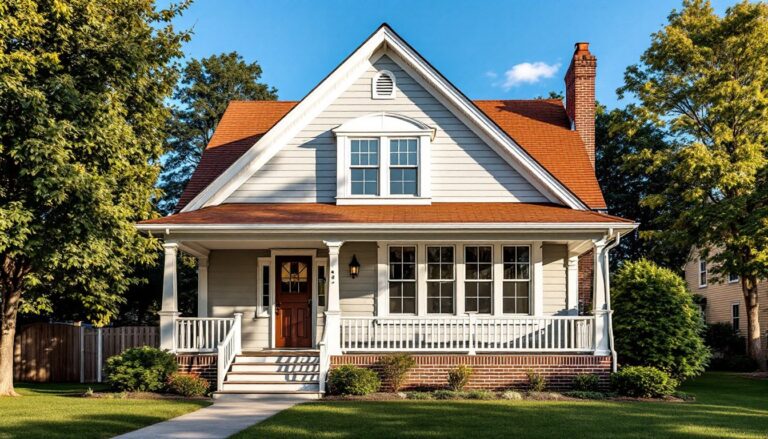
Traditional designs often mimic pitched-roof architecture, using the same roofing material as the main house (asphalt shingles, metal standing seam, or cedar shakes). Exposed wood beams, stone or brick foundations, and classic rafter tails add character, especially in homes with period details. Rustic patios frequently feature wood ceilings (open rafters or soffit-and-fascia designs), stone or stained concrete floors, and wrought-iron railings. Homeowners pursuing this style often look to regional precedent, for instance, those interested in farmhouse or cottage aesthetics find porch and outdoor living ideas particularly relevant for grounding design choices in proven layouts and materials.
Essential Materials and Building Components
An attached patio requires a solid foundation, a roof structure, and finishing elements. Start with the foundation: most attached patios use either a frost-protected concrete slab (if your frost line allows) or concrete piers driven below the frost line to prevent heave. Nominal 4×4 or 6×6 pressure-treated posts transfer roof load to those footings: never sit posts directly on soil or above-ground pads.
For framing, you’ll typically use pressure-treated lumber for posts and beams where wood contacts concrete or soil, and standard dimension lumber (2×10, 2×12 joists) for the roof structure. Roof materials vary: asphalt shingles (cheapest, requires 1/2-inch plywood or OSB sheathing), metal panels (durable, allows open or solid installation), or composite alternatives (cost-effective, low maintenance). Don’t skimp on fasteners, galvanized or stainless-steel hardware resists rust in outdoor exposure.
Flashing is non-negotiable where the roof attaches to the house wall: aluminum or stainless steel flashing prevents water intrusion into the rim joist and framing. Gutter and downspout systems direct runoff safely away from the foundation. If you’re adding amenities, electrical outlets, ceiling fans, lighting, run rough-in before roof sheathing goes on. Professionals familiar with framing guides and building science often catch framing errors and help optimize load paths before work is complete.
Key Steps in Planning Your Attached Patio Layout
Start with a rough site survey. Measure the length of your house wall where the patio will attach, note the height of the rim joist or band board, and mark the footprint on the ground with flour or chalk. A typical attached patio ranges from 12 to 20 feet wide and 10 to 16 feet deep, but your needs may differ.
Sketch a basic plan (pencil and graph paper work fine): show the attachment point, roof slope, post locations, and how the patio connects to doors and existing features. Include dimensions and note the roof’s highest and lowest points. If your house roof is pitched, decide whether your patio roof will parallel it or be independent. Parallel designs look integrated but require careful flashing: independent roofs give design freedom but may look disconnected if not detailed carefully.
Mark post locations. Posts should sit on footings, typically spaced 8 to 12 feet apart depending on the roof load and local snow/wind codes. Account for beam size: a 2×12 pressure-treated beam spans farther than a 2×10, so larger spacing may work. Sketch where stairs or ramp access connects if there’s a height difference between the house and patio level. Finally, note utility locations, property lines, and any drainage patterns. Once the layout feels solid, take photos and measurements, and share them with your local building department or a contractor to verify feasibility before you commit.
Permits, Codes, and Professional Help
Nearly every attached patio requires a building permit. Because the structure ties to your house, inspectors review plans to ensure the roof load is safely transferred to the foundation, flashing is correctly detailed, and electrical work (if any) meets NEC standards. Codes vary by jurisdiction, but most enforce minimum footing depths below the frost line, specify post spacing and beam sizing, and require proper roof ventilation or drainage.
You’ll need a permit application, a site plan showing property lines and setbacks, and often construction drawings with dimensions and material details. Some jurisdictions allow a homeowner to pull a permit and do the work: others require a licensed contractor or engineer stamp. Snow load and wind speed ratings in your region directly affect post spacing and roof framing, a patio in Minnesota handles very different loads than one in Florida. Don’t guess: contact your local building and planning department early.
Hire a professional if: you’re uncertain about structural attachment, your house wall is brick or stone (attaching requires special flashing), the patio is over 200 square feet, you’re adding electrical service, or codes require engineer certification. Landscape and outdoor design resources offer inspiration, but structural decisions belong with licensed pros. A structural engineer’s stamp costs $300–$800 but prevents costly rework and protects you legally. Most contractors include permit costs and timelines in their bids, so ask upfront what’s included and what’s on you.